• Business

  • Consulting

  • Digitalization

  • Jira

Release management with JIRA and Confluence

calendar icon 5 November 2018
clock icon 11 minutes read
JIRA and Confluence
Share article
  • linkedin icon
  • x(former twitter) icon
  • facebook icon

Introduction

The principles of release management are not new and are widely known, mostly due to the ITSM/ITIL framework.

According to Wikipedia, release management is the process of managing, planning, scheduling and controlling a software build through different stages and environments; including testing and deploying software releases.

Among some development teams, there is a misconception that the software release is an only about “to deliver the code (the new functionality) to a production server”. In case of such an approach, the release management flow stops right after the code delivery. And a big disadvantage here is about no one is ready to answer the important questions, like

  • “what features were delivered to week/month ago”,
  • “what features are planned to be released this/next week”,
  • “what was the last release structure (how many new features, bug fixing, UI or UX improvements, etc)”.

Agile environment, dozens of new tasks and daily product support activities are taking the situation far and far more out of control.

And here JIRA and Confluence tools are ready to handle the mess with the essential answers.

Functions of JIRA

JIRA is a project tracking software. It is enough customizable to be set up for any software development flow. You can:

  • Organize cross-project multi-version releases using Kanban-like Release board.
  • Track progress, spot impediments and delayed versions and releases.
  • Define custom release and version workflow based on your existing processes.
  • Automate routine operations via bulk version create and update operations
  • Time-centric releases and versions overview with Timeline
  • Flexible Release Notes generator
  • Share Release boards with users, groups or whole project team
  • Reports and Gadgets
  • Public REST API

It has its own language (JIRA Query language - JQL) that is applied for searches and filtering.

What is Confluence?

Confluence is a Wiki-style software for creating, organizing and discussing the work. It consists of workspaces and pages. Pages can be easily created and modified via an intuitive and functional editor. It also supports the dynamic data for pages taking them directly from JIRA.      

In this article, I want to consider the connection of Jira and Confluence and how it helped us in managing the releases.

Tracking and Reporting Releases

Our team checked several tracking tools and chose JIRA as the most suitable to meet current project needs.

JIRA Cloud by Atlassian contains releases functionality out from the box. Later, we began to use Confluence as a knowledge base for versions storing. As both products belong to the Atlassian family they can be easily integrated with each other.  

How to do Release Reporting with Confluence 

Once you have added all items to your release, there are two ways of generating reports: in Jira directly and in Confluence. You can run a release report in Jira at any time to see the progress of your release. This report will show you how many total issues are in the release broken down by the number in a completed status, in progress or yet to do. One nice advantage is the progress bar that shows this all visually.

One thing to note about this report is that it will report epics (if they are labelled as being in a particular version, which one would likely do) as items as well as all of the issues under that epic, which can be misleading in the issue count.

Confluence Reporting

Confluence helps us to collect and organize all the work and information for each release and to communicate what it's all about to the rest of the business.

Building an awesome release planning page that will help you do the following:

  • Identify the key objectives, people, and a high-level roadmap
  • Collect all the relevant background information and ongoing work
  • Direct your colleagues to additional details in JIRA and on related pages

You can set your release up for success from the start with a single source of truth for everyone working on it. Follow these steps to create an awesome release planning page.

Confluence JIRA release management in four steps

Basically, the updated release management flow using JIRA and Confluence consists of several steps:

  1. Create a version for the next release;
  2. Assigning the tasks to the versions;
  3. Tracking releases;
  4. Reporting releases.      

1. Create a version of the release in JIRA

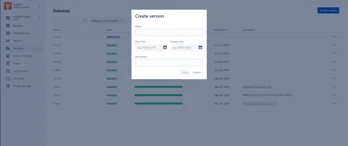
The initial step to start release planning is to create a version in JIRA:

JIRA and Confluence 2

Our team uses names in the format “x.x.x.x”, where the last number is reserved for various kinds of “hotfixes”. Sure, it can be customized to add any text data.

2. Assigning the tasks to versions

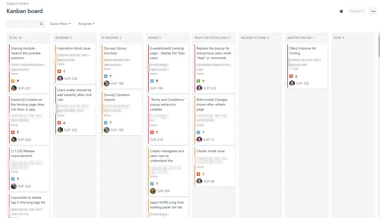
We use Kanban board with various statuses columns to move the ticket throughout its lifecycle.

Kanban Board

The version should be assigned to the ticket while changing the status into “Awaiting release” on Kanban board.

It means that the feature was well-tested, merged to “release” branch and is waiting to be released (deployed to the needed environment).

The version can be assigned to a ticket if it must be included to the certain release.

3. Releases tracking in JIRA

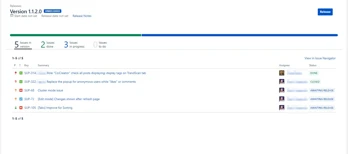
The release may contain the tasks with different statuses (e.g. “In progress”, “Reopened” or even “Closed”). Clicking the “Releases” in JIRA displays the report:

Version Details

JIRA will not allow you to release the version until the development team complete al the tasks or remove the task from the current release.

After merging to “feature” branches, a “release” branch should contain all the required features to be delivered under the current release. All the tasks on the Kanban board should be in “Awaiting release” status.

The final step for developers here is to deliver the “release” branch to “production” (Live site).

Finally, QA checks every feature on Live site and move the task to “Done” status on Kanban board.

To release the version in JIRA you simply click on “Release” button and set up the release date. The next step is to prepare the release page in Confluence and notify a client about the release.

 4. Release Reporting Structure

Our team uses the following page structure:

Instance #1:

  • Releases deviation*
  • Release 1.1.1.0
  • Release 1.1.0.0
  • Release 1.0.9.0

Instance #2:

  • Releases deviation
  • Release 1.1.1.0
  • Release 1.1.0.0

Instance #3:

  • Releases deviation
  • Release 1.0.9.0

* Release deviation is the difference between the latest and delivered to the particular instance release.

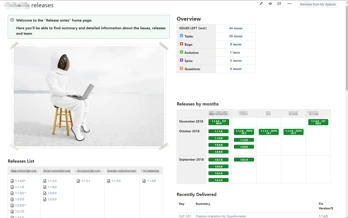
Here is the “Releases” Homepage:

Release Notes

After the version was released in JIRA, we create a page for the release in Confluence:

  • click on “Add Release report” button at the instance page. 
Add Release Report Button
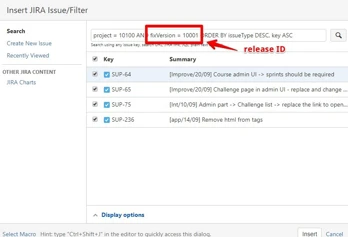
  • fill some fields (page Title, Date, etc) including the release version in JQL request.
Change Release Id
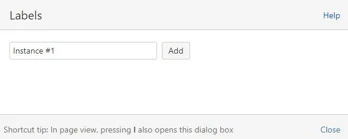
  • add the label to the page (assuming instance is a label to group the pages under the hierarchy)
Add Label

The version page in Confluence is ready.

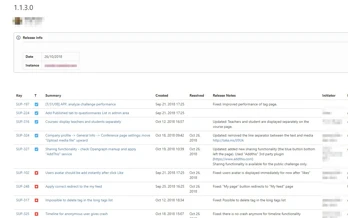
Confluence automatically gets all the tasks from JIRA related to the particular release.

The displayed columns (JIRA issue fields) on the release page can be easily customized easily and added to the page template.

Release Page

And finally, we check release notes for the tasks. This one is very time-consuming but it pays off. We use this custom field “release notes” in JIRA ticket for “human readable” comments. We use simple words, easy to understand for the client (neither ticket title, nor summary or comments) what was done under the current task.

Release Notes Field

To add the release notes open JIRA ticket from Confluence and update the description.   

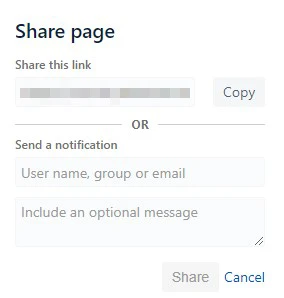
When you are ready to report the release, share the page and notify the client.

Sharing

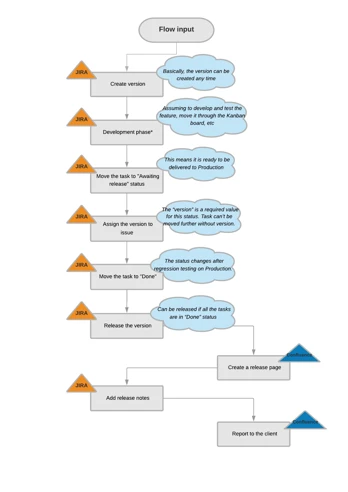
The basic flow with JIRA and Confluence applications:

Release Flow

Our results

After a couple of weeks, our team get used to the upgrade in the releases management process.

This model makes the workflow transparent for all the project stakeholders.

  • For the development team: release planning, executing and storing the versions.
  • For the clients: 24/7 access to the updated information WHAT, WHERE and WHEN was done.

Perfection is unachievable, but our team does the best to improve the workflow every day to provide top-tier .NET outsourcing services.

And we are glad to see the currents results: happy customers and satisfied developers. 

Oleg Royko photo
Oleg Royko
Project Manager
Share article
  • linkedin icon
  • x(former twitter) icon
  • facebook icon

Safe steps to the legendary partnership!

At UKAD, we exclusively recruit certified professionals dedicated to continuous development. Our team prioritizes ongoing improvement, consistently enhancing their knowledge and expertise through prestigious certifications

Hire a developer
Certificate 1

Contacts

Need support or have a question — contact with us